Quick Start & Installation
1. Prerequisites: System Requirements
Before installing Mailslide, please ensure your environment meets the following conditions:
- Windows OS
- Outlook Classic (Must be the classic version; this application does not support New Outlook)
- Windows Terminal (Highly recommended, built-in on Windows 11, provides the best visual and formatting display)
- Note: Outlook must remain open during the execution of this program (while extracting emails).
2. Install Required Tools: uv
Mailslide uses uv (an extremely fast Python package manager) for distribution and environment management. Please install uv according to your preference:
# PowerShell (Windows)
powershell -ExecutionPolicy ByPass -c "irm https://astral.sh/uv/install.ps1 | iex"

# or via pip
pip install uv

# or via winget
winget install astral-sh.uv
3. Installation and Starting Mailslide
This system provides two different installation and execution methods. Please choose the one that best fits your use case. The software comes with two user interfaces:
1. Graphical User Interface (TUI, mailslide-tui): Recommended for beginners, featuring complete setup guides, schedule management, and an execution dashboard.
2. Command Line Interface (CLI, mailslide): Best for advanced users doing one-off bulk runs or integrating with other systems.
💡 Tip: We recommend using Windows Terminal (Start Button => Right-click => Terminal, or search for "Terminal") to start the application for better compatibility and display.
Option A: End Users (Recommended)
The simplest installation method, installing Mailslide globally on your computer as a tool:
# 1. Install Mailslide
uv tool install mailslide

# 2. Start the TUI interface
mailslide-tui
(To upgrade the software in the future, simply run: uv tool upgrade mailslide)
Option B: Developers (Source Mode)
If you want to run the project from the GitHub source code or do secondary development:
# 1. Sync dependencies (make sure to use uv sync to keep dependency versions consistent)
uv sync

# 2. Start the TUI interface
uv run app.py
4. Initialization and Execution
Once Mailslide starts and enters the TUI home page, please follow these steps to complete the initial setup:
Step 4.1 Initialize Configuration
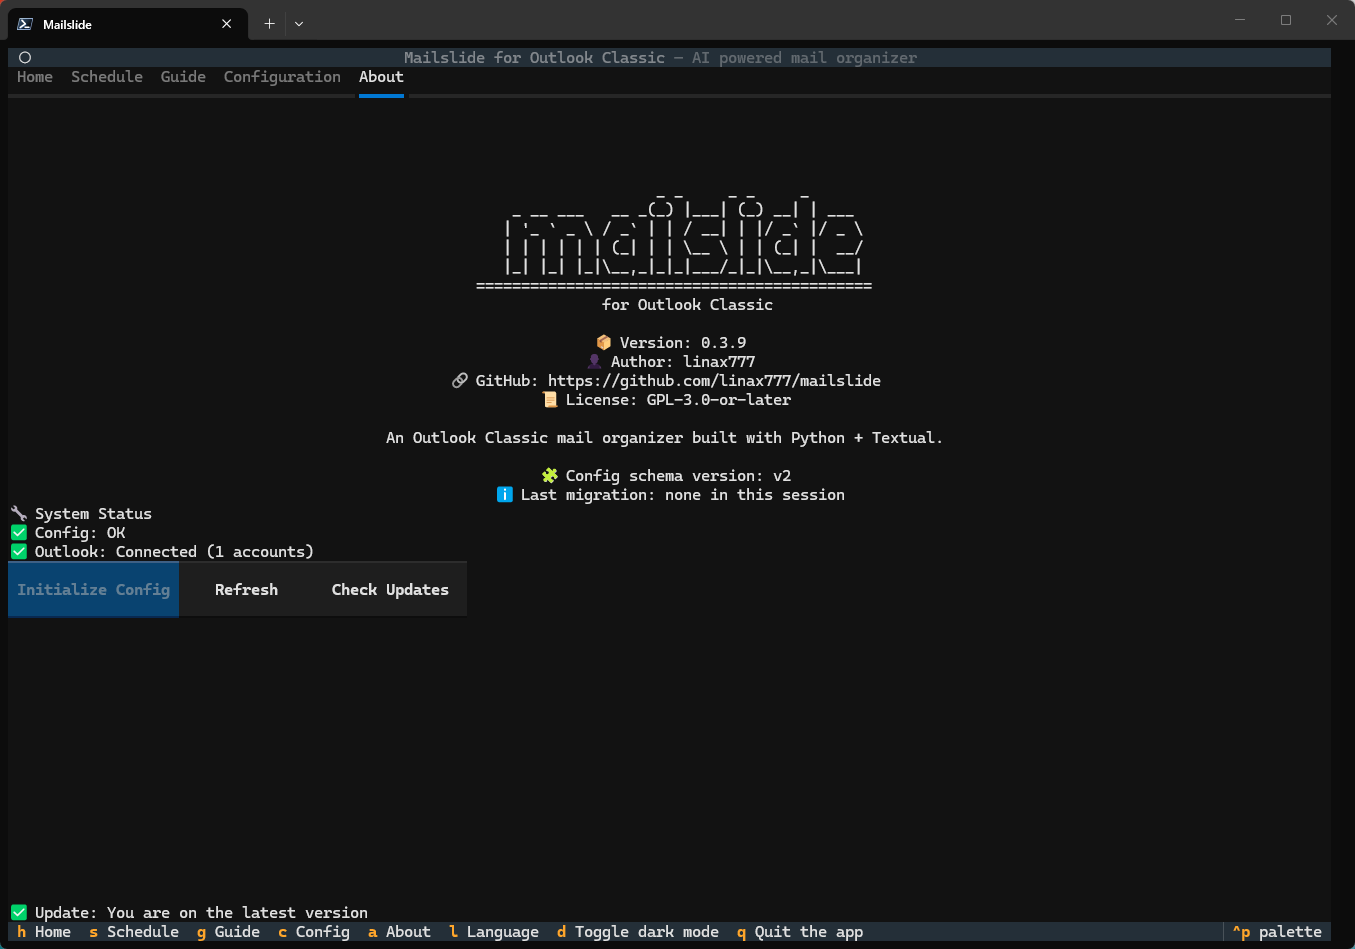
For first-time use, please go to the About tab (press A or click the top tab), and click the Initialize Config button.
The application will automatically copy all *.yaml.sample template files into proper *.yaml configuration files for you.
⚠️ (If you are using Source Mode, you can also manually copy the sample files in the
config/directory without using the TUI)
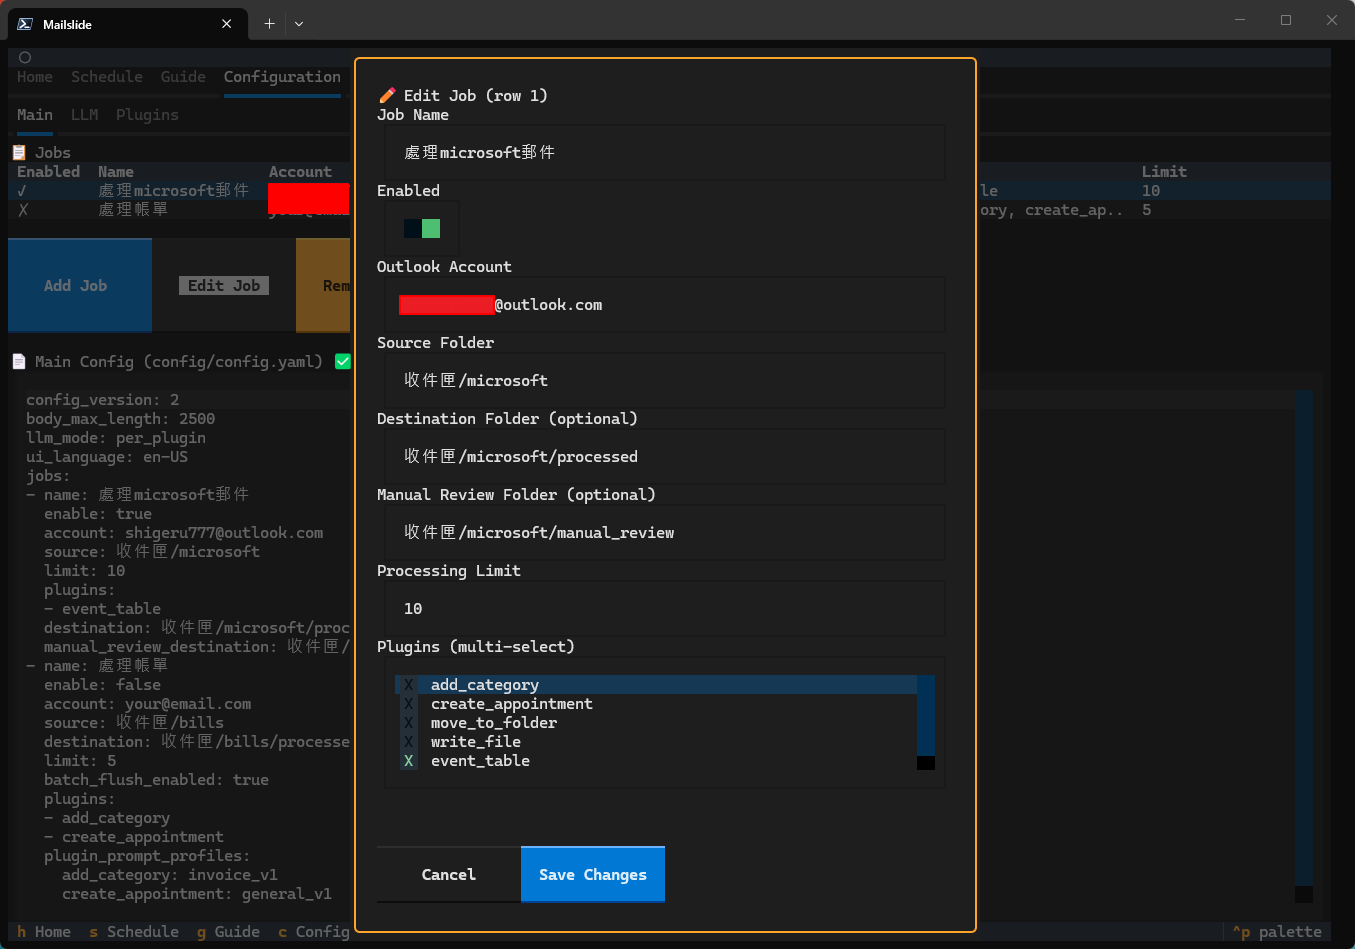
Step 4.2 Set up Extraction Rules (Jobs)
Switch to the Configuration → Main Settings tab. For first-time use, you must configure the Outlook email account or PST file path you want to extract from. After making changes, click Validate and Save.
Step 4.3 (Optional) LLM and Plugin Settings
If your tasks require using AI to read emails or starting Plugins (such as sending to a webhook): - LLM Settings: Switch to Configuration → LLM Settings, enter your API Key, and click Test Connection. The key is securely encrypted and stored via Windows DPAPI. - Plugin Settings: Switch to Configuration → Plugin Settings, select the plugin, and fill out the required service form.
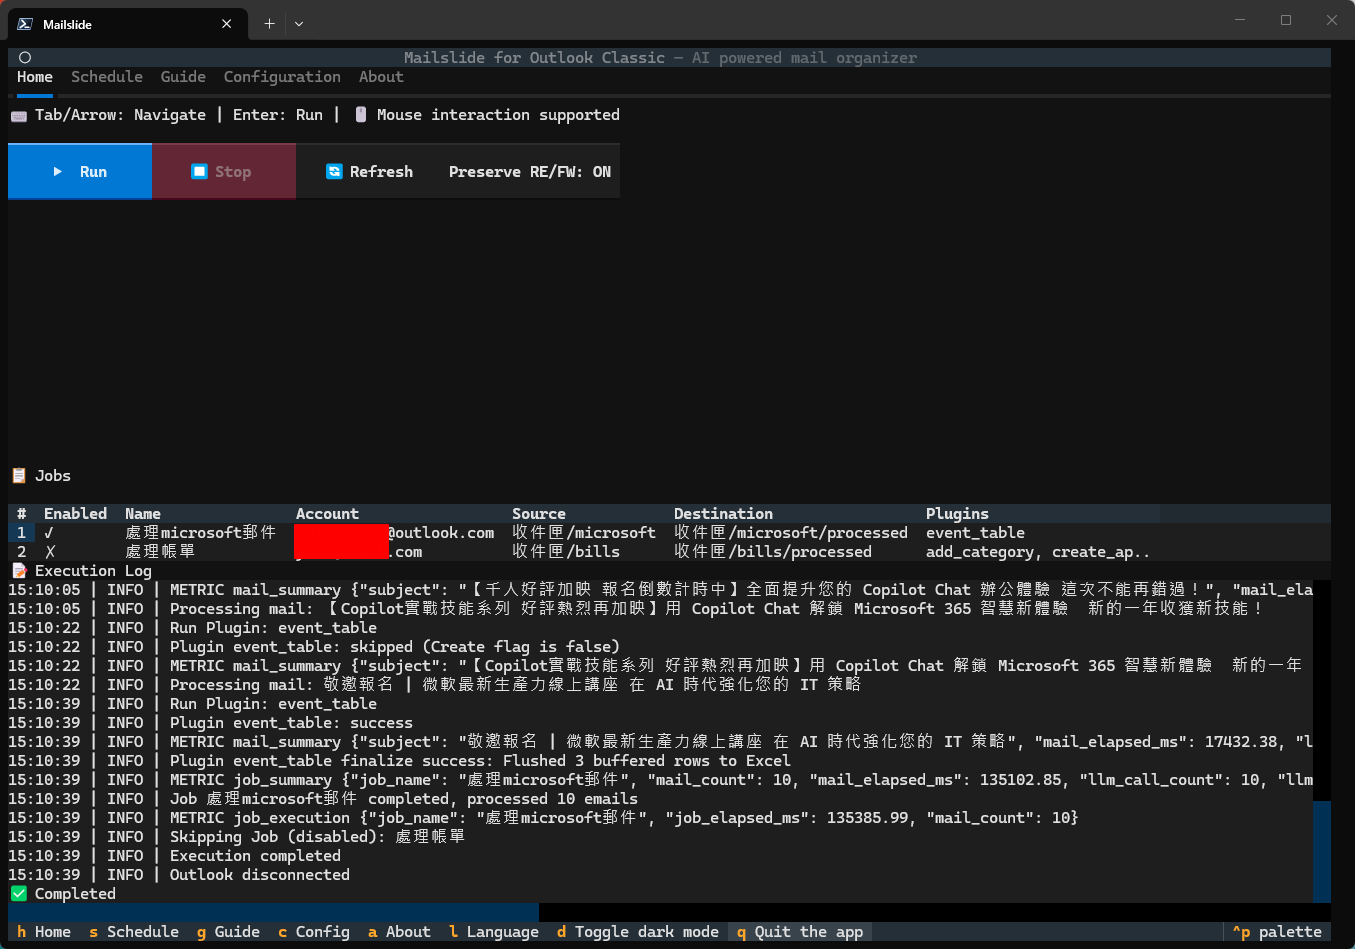
Step 4.4 Execute Email Processing
Return to the Home tab and click the Execute button at the bottom. The system will start processing the emails sequentially according to your configured Jobs, and the processing logs and progress will scroll in real-time at the bottom!
👉 Next Steps
If you want to dive deeper into the detailed operations of each function, you can refer to the following documents:
- TUI Guide (TUI): Learn how to set up automatic scheduling, backup & recovery, and keyboard shortcuts.
- Configuration (Configuration): Understand the logic behind each configuration file parameter.
- CLI & Advanced Usage: Skip the UI and use command lines for quick one-off executions.